
1. Start Survey
Clicking the Start button on the Step 3. Identify hazardous factors page opens the page for evaluating risks and checking the status of risk reduction measures (Step 4. Evaluate Risks and Reduction Plans).
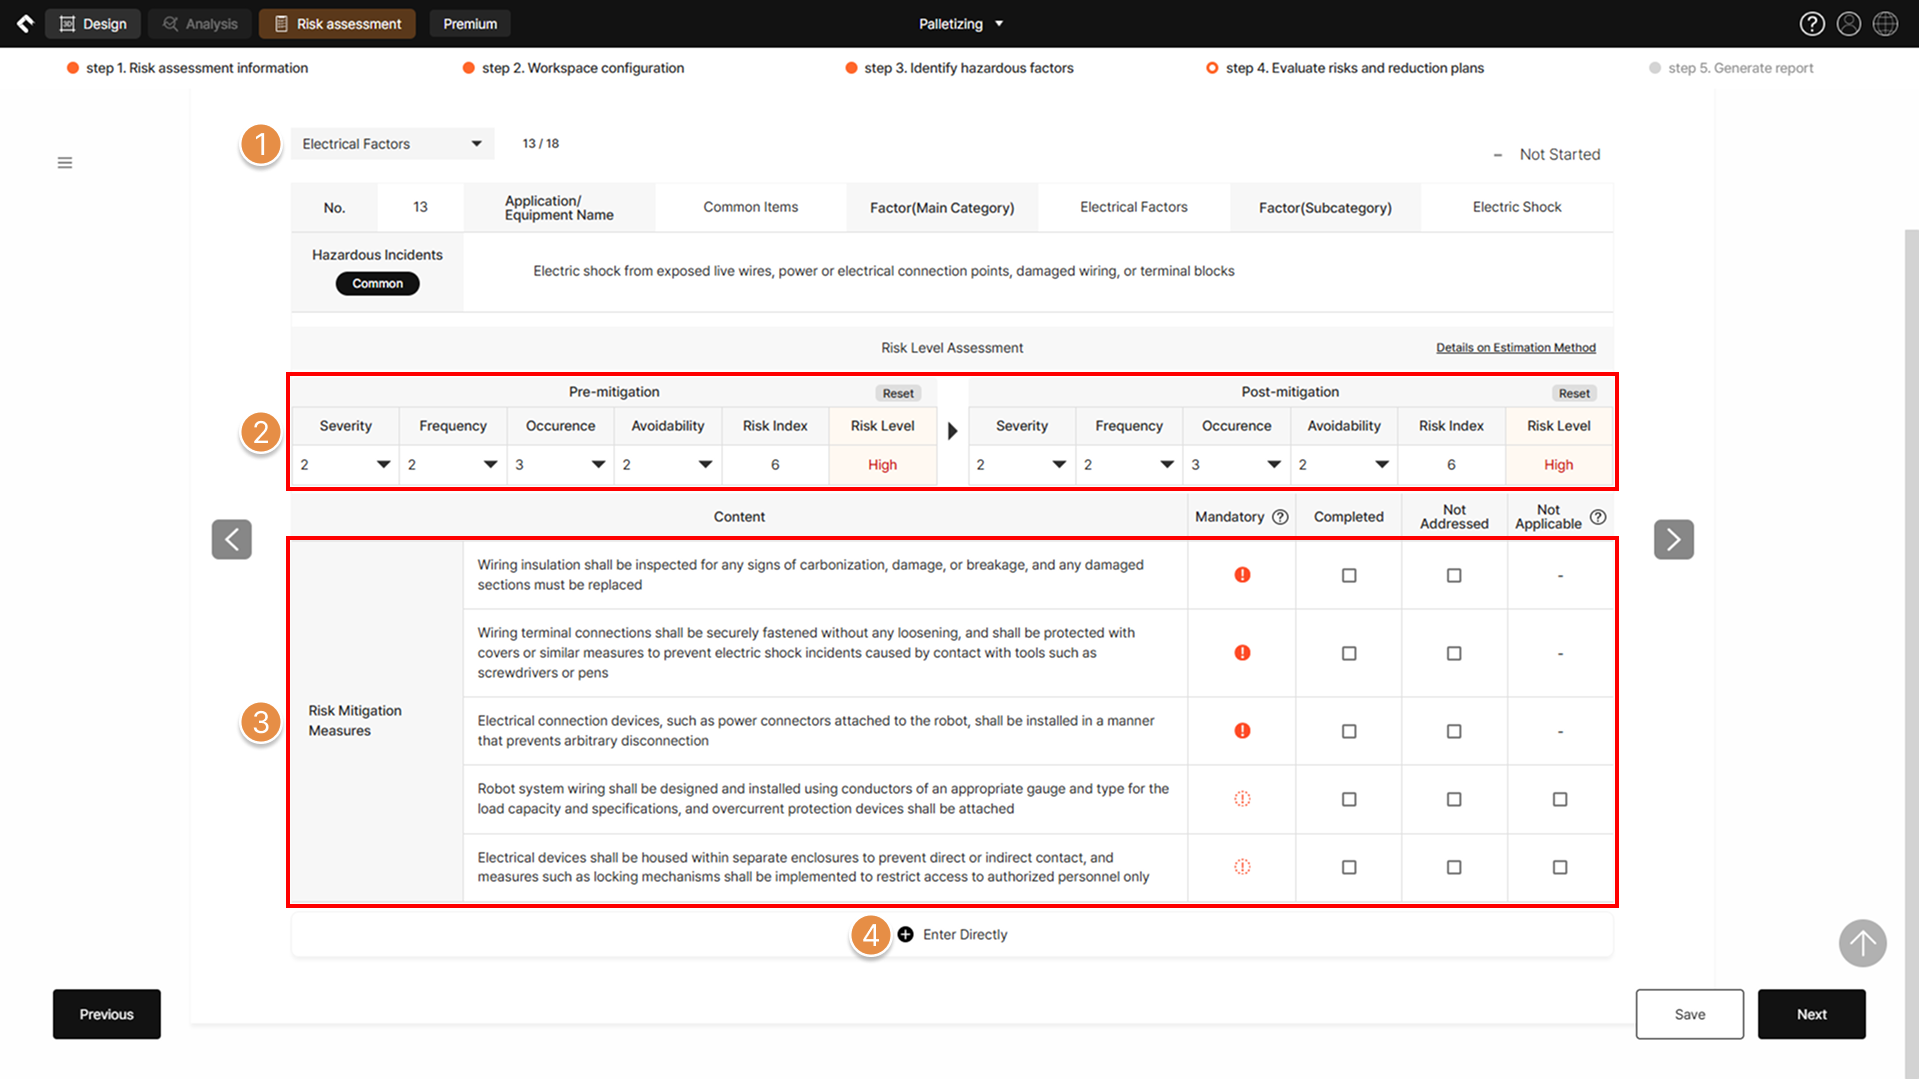
Step 4 – Evaluate risks and reduction plans
① Change Risk Factors Classification
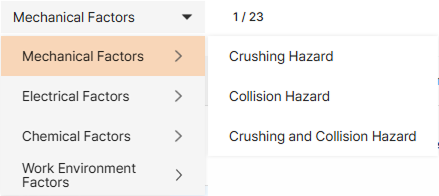
Click the dropdown menu to navigate to the survey page for other risk factor items.
② Risk Level Assessment
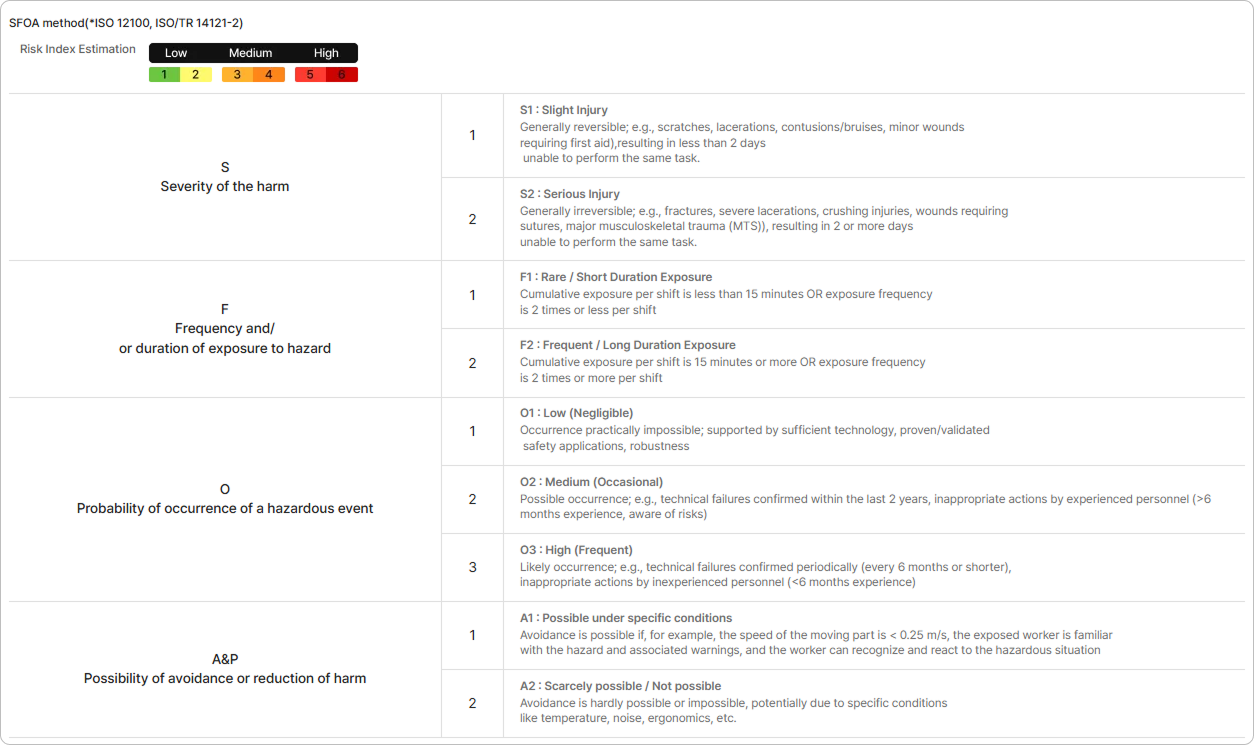
The calculated risk level (Low/Medium/High), determined according to the SFOA risk estimation method, is displayed. If the application results of risk reduction measures satisfy SafetyDesigner’s internal algorithm rules, the post-measure risk level is automatically reduced to Low Risk. After entering risk reduction measures via the Enter Directly feature, it is also possible to manually change the risk level by clicking the ▼ button at the bottom of the SFOA menu.
③ Risk Reduction Measures
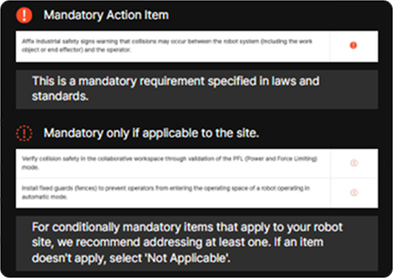
You can identify which safety measures need to be implemented to reduce the risk level of the hazardous event currently being evaluated to Low Risk. Select Completed or Not Addressed according to the current implementation status of the risk mitigation measures. If the survey content is not applicable to the assessed robot system, check Not Applicable.
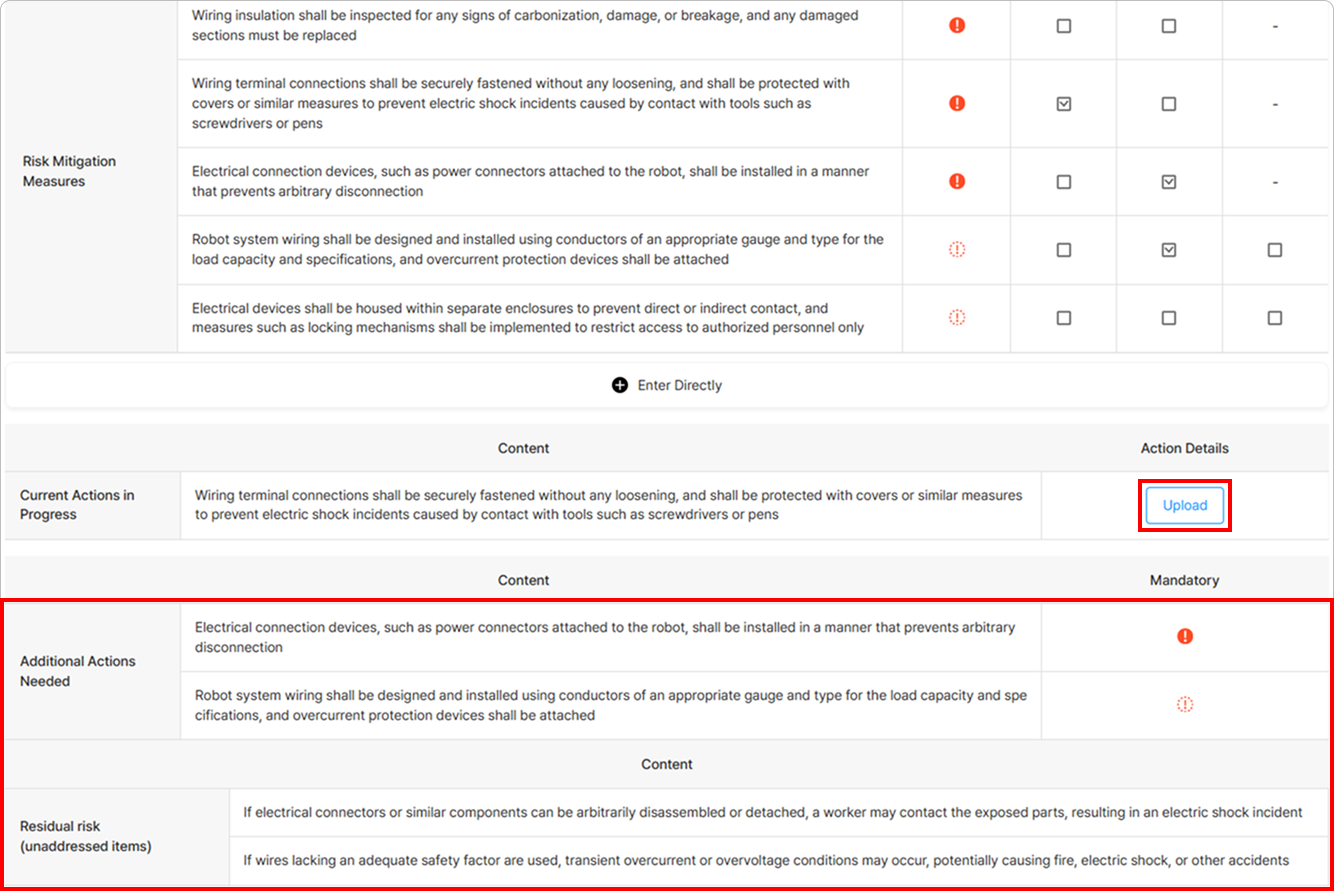
If a mandatory measure is checked as Not Addressed, the risk will not be reduced to Low Risk, and it will be listed at the bottom of the survey page as Additional Actions Needed. Additionally, it is recommended to upload photos for completed measures. These uploaded photos will be included when generating the risk assessment report.
Warning
Mandatory measures are safety actions strongly recommended by robot-related standards. For optional measures, ‘Not Applicable’ can be selected if unnecessary based on the robot installation environment, or ‘Not Addressed’ if the action has not yet been taken. However, implementing all possible items is recommended to ensure safety.
④ Enter Directly

If a safety measure you applied to reduce the risk of the hazardous event is not listed, you can manually add it using the Enter Directly feature.