
1. Input Robot Information
On the Create Application page, double-click the application you created to enter the 3D application design screen.
Click the Library button among the category buttons on the right side of the 3D screen to place the robot for analysis on the screen.
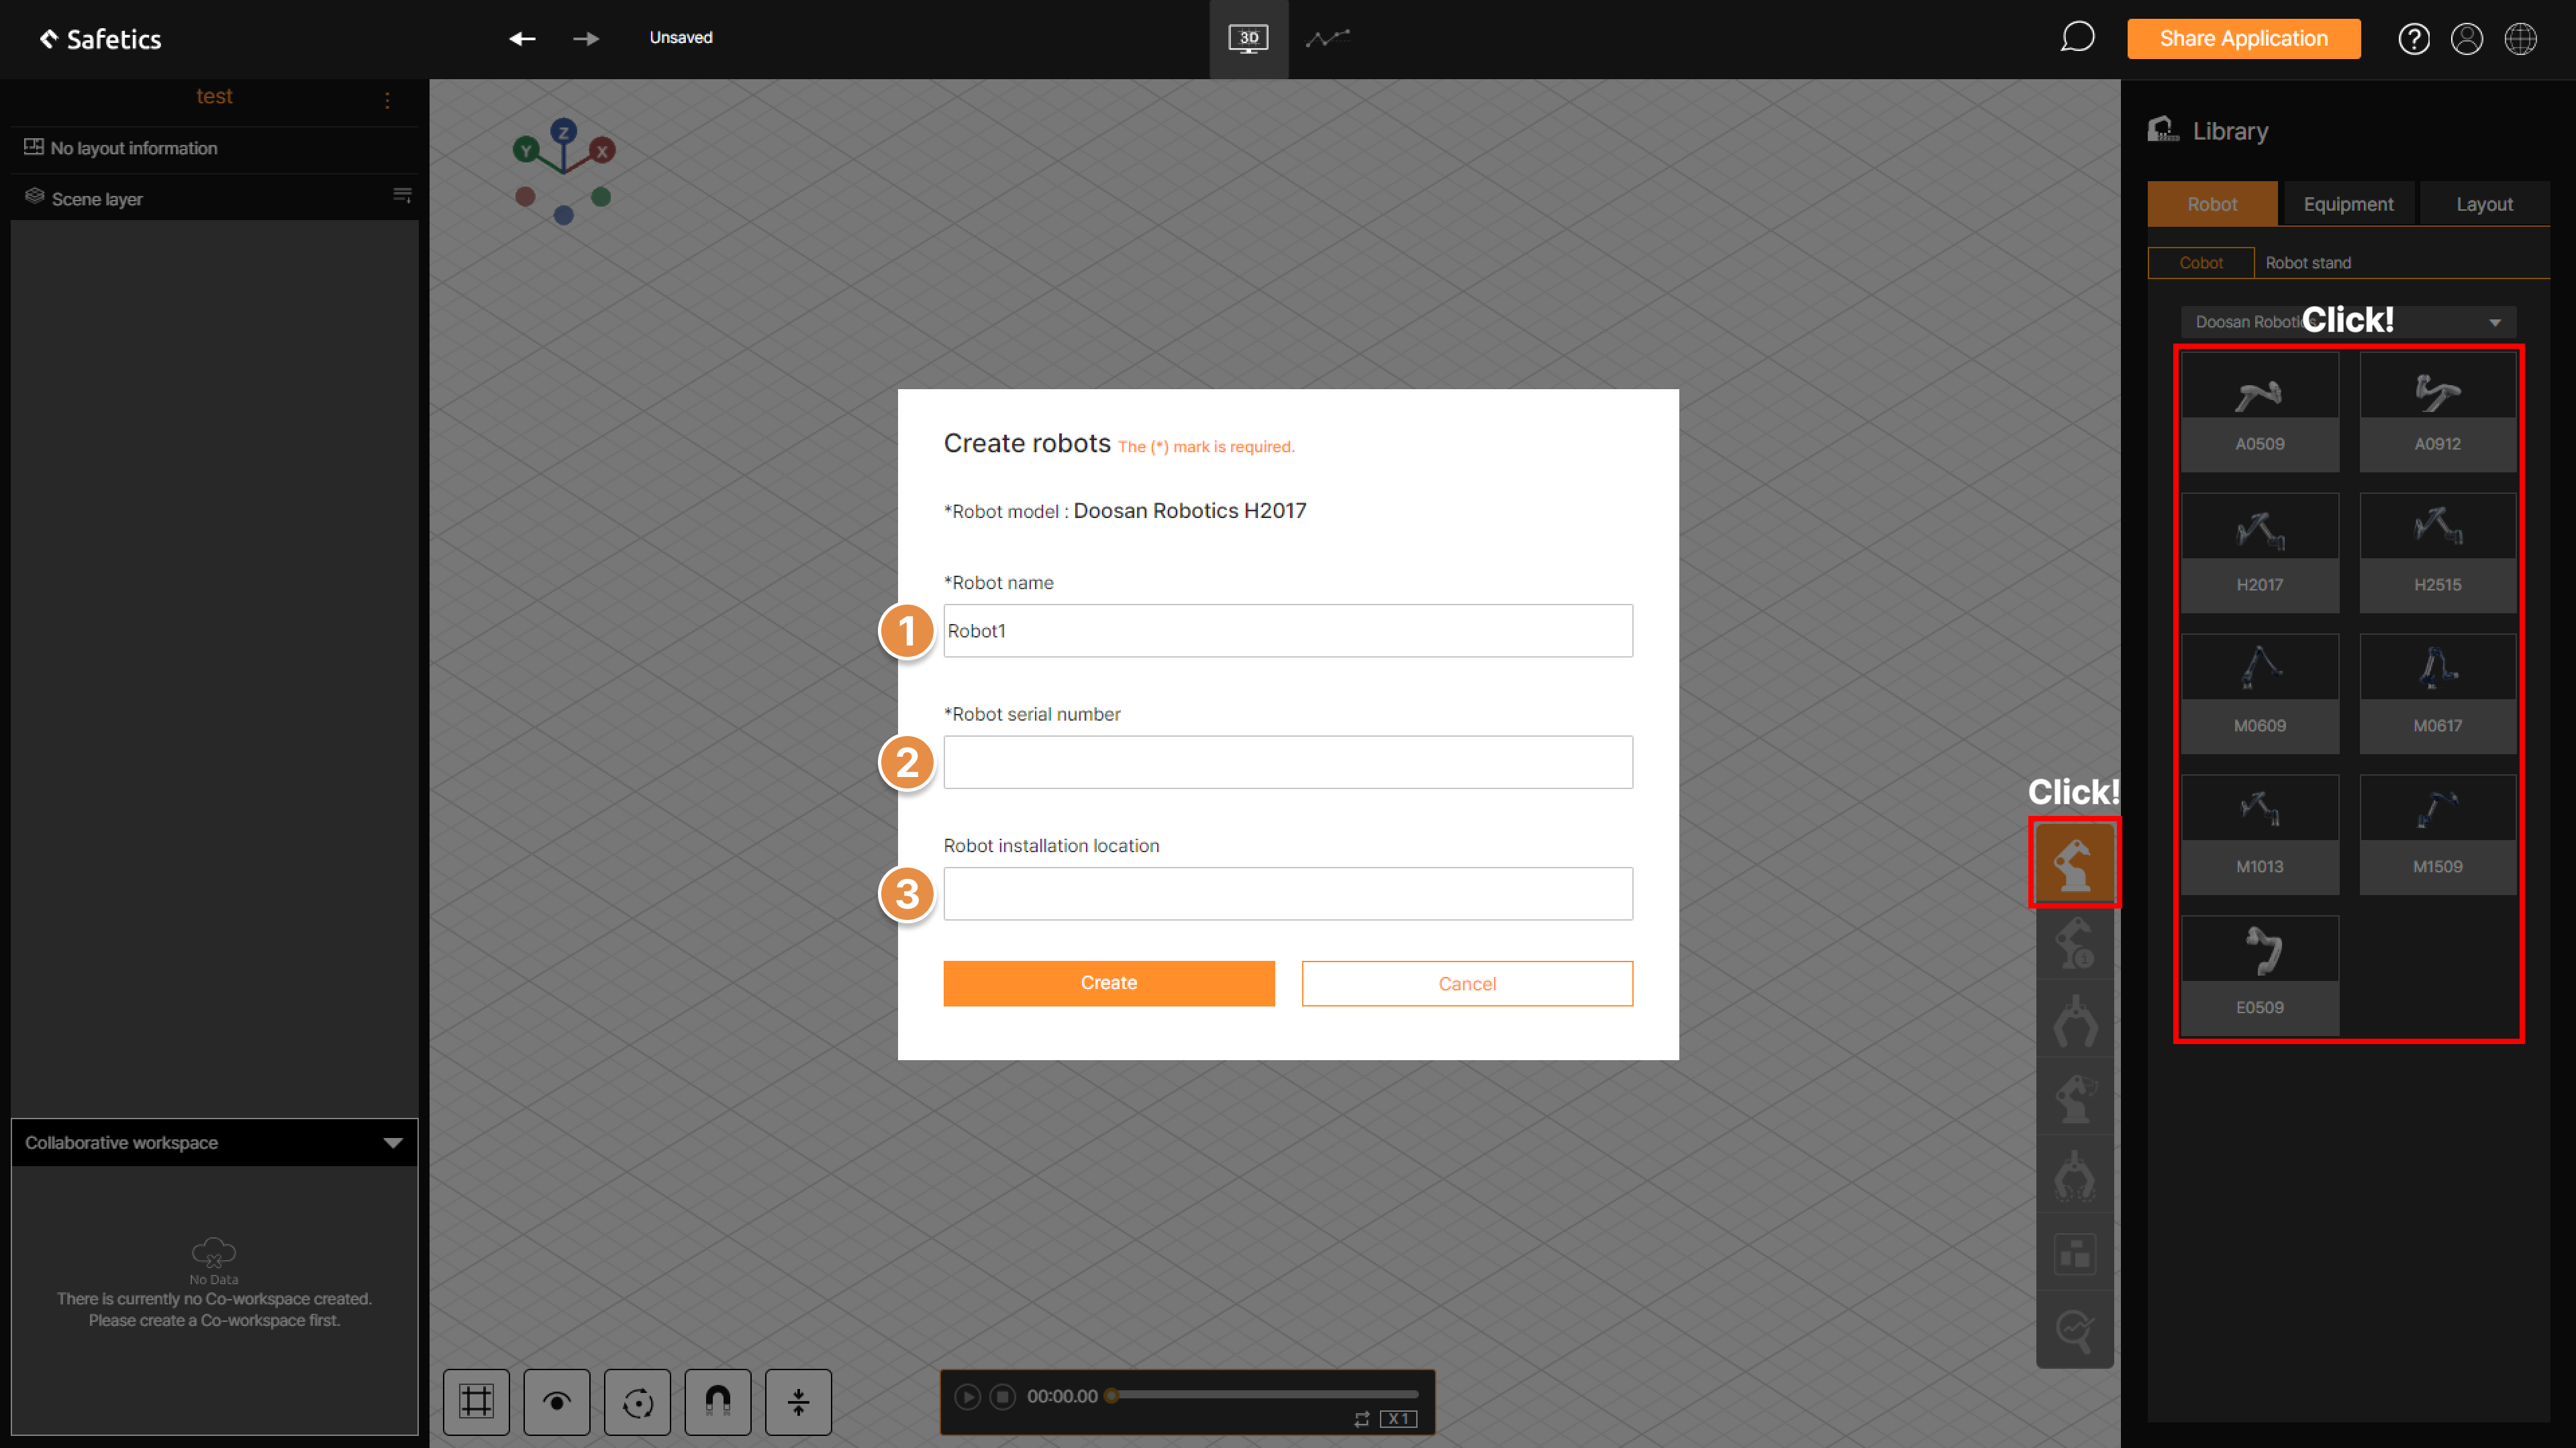
① Select Robot Category
From the Library menu on the left of the 3D screen, select the robot type to place.
② Select Robot Manufacturer and Model
Select the robot manufacturer from the drop-down menu, then click the desired robot model.
③ Place the Robot in the 3D Screen
Once a model is selected, you can place it on the 3D screen. Left-click the desired location to place the robot.
✅ What robot models are available?
- The robot models registered in SafetyDesigner are listed below. Additional robot models will be added continuously, and the collision risk analysis feature is applicable to collaborative robots and mobile robots.
<Collaborative Robots>
* Robots that cannot generate motion are indicated in red.
| Manufacturer | Model |
| Universal Robot | UR3, UR3e, UR5, UR5e, UR10, UR10e, UR16e, UR20, UR30 |
| Doosan Robotics | A0509, A0912, E0509, M0609, M0617, M1013, M1509, H2017, H2515, P3020 |
| Neuromeka | Indy7, Indy7-V2, Indy12, Indy12-V2, Indy-RP2, Indy-RP2-V2, Nuri-CR20, NURI-SR3, NURI-SR4, OPTI5 |
| Rainbow Robotics | RB3-730, RB3-1200, RB5-850, RB10-1300, RB16-900, RB20-1900ES |
| Techman Robot | TM5-700, TM5-900, TM12, TM14, TM14S, TM16, TM20MX |
| Hanwha Robotics | HCR-5A, HCR-12A, HCR-10L, HCR-14 |
| FANUC | CRX-10iA/L, CRX-20iA/L, CRX-25iA, CRX-30iA, CR-35iB |
| Hyundai Wia | HW1513 |
| PULOON | SYMPHONY5, SYMPHONY10 |
| LG | CLOi COBOT5 |
| Atom Robot | AM-20, AM-30 |
| SIASUN | GCR25-1800 |
| Elite |
ARC S3, ARC S12, ARC S20, ARC S25 |
| ABB |
GoFa10 |
| DOBOT |
CR10A, CR20A |
<Industrial Robots>
| Manufacturer | Model |
| ABB | IRB 1600-6/1.2, IRB 2400/10, IRB 4600-20/2.5, IRB 6700-150/3.20 LeanID, IRB 7600-150/3.5 |
| KUKA | KR 4 R600, KR 20 R3100, KR 120 R1800 nano, KR 150 R2700-2, KR 360 R2800-2 |
| KAWASAKI | BA006L, BX130X, BX200L, RS007L, RS015X |
| YASKAWA | AR1440, AR2010, GP12, GP50, GP180 |
| FANUC | ARC Mate 100iD, LR Mate 200iD, M-710iC/50, R-1000iA/80F, R-2000iC/165F |
<Mobile Robots>
| Manufacturer | Model |
| Robotnik | RB-KAIROS |
| OMRON | HD1500, LD60, LD250 |
| MiR | M250, M600, MC250, MC600 |
2. Check Robot Layout
If the robot is positioned on the 3D screen, the robot information will be displayed in the property menu on the right side of the 3D screen.
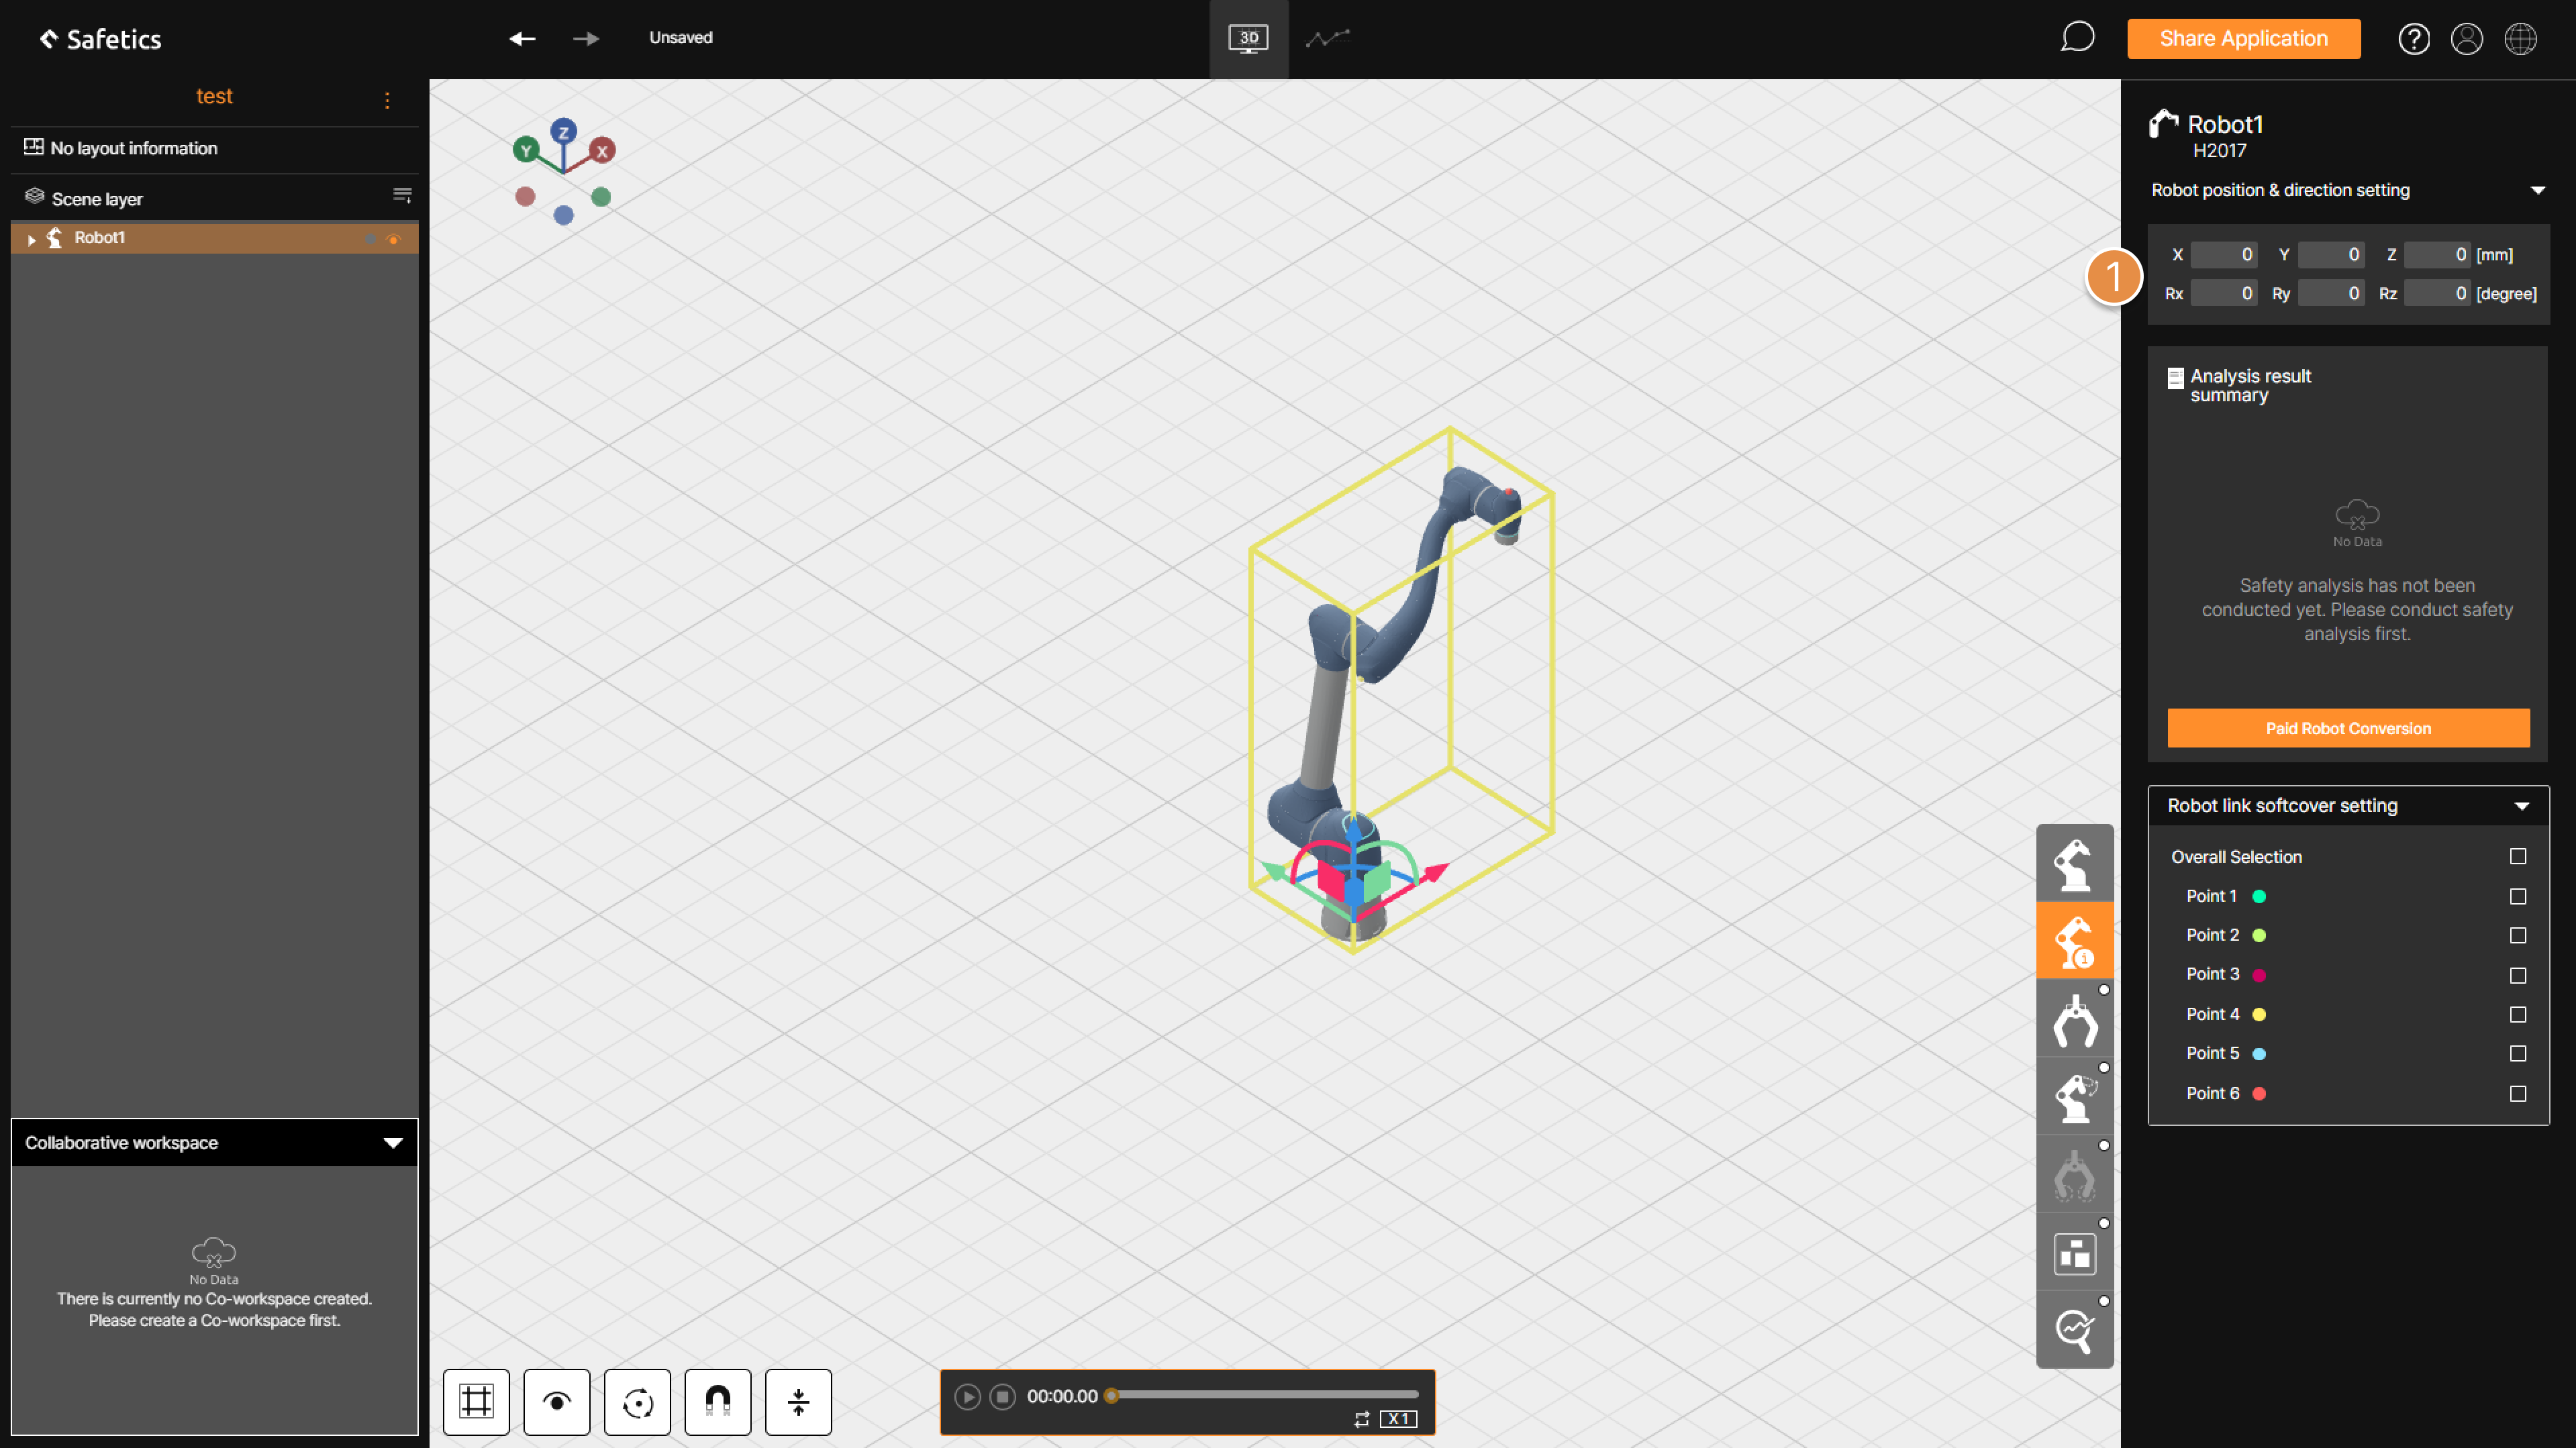
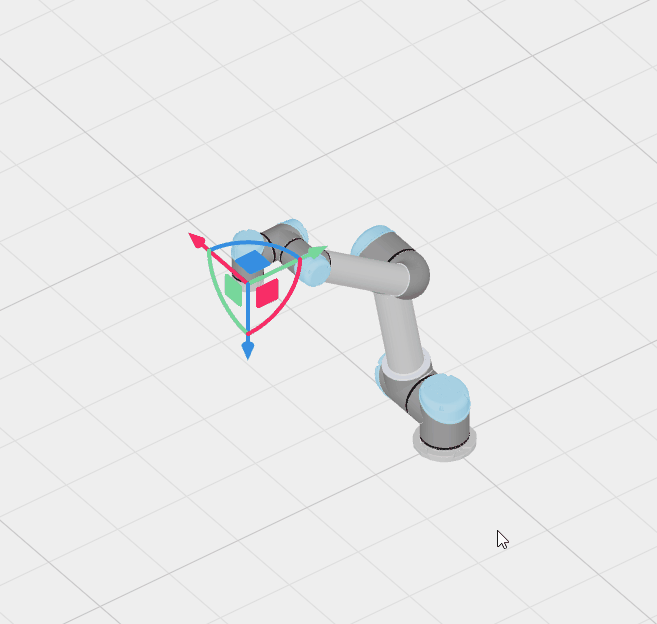
① Robot position and direction settings
Set the robot’s position and direction through the pivot controller on the 3D screen or the property menu on the right side of the screen.
🚨 The robot can be moved from -20000 mm to 20000 mm and can be rotated from -180° to 180°.
3. Edit or Delete Robot
Right-click the robot on the 3D screen to edit or delete the robot’s information.
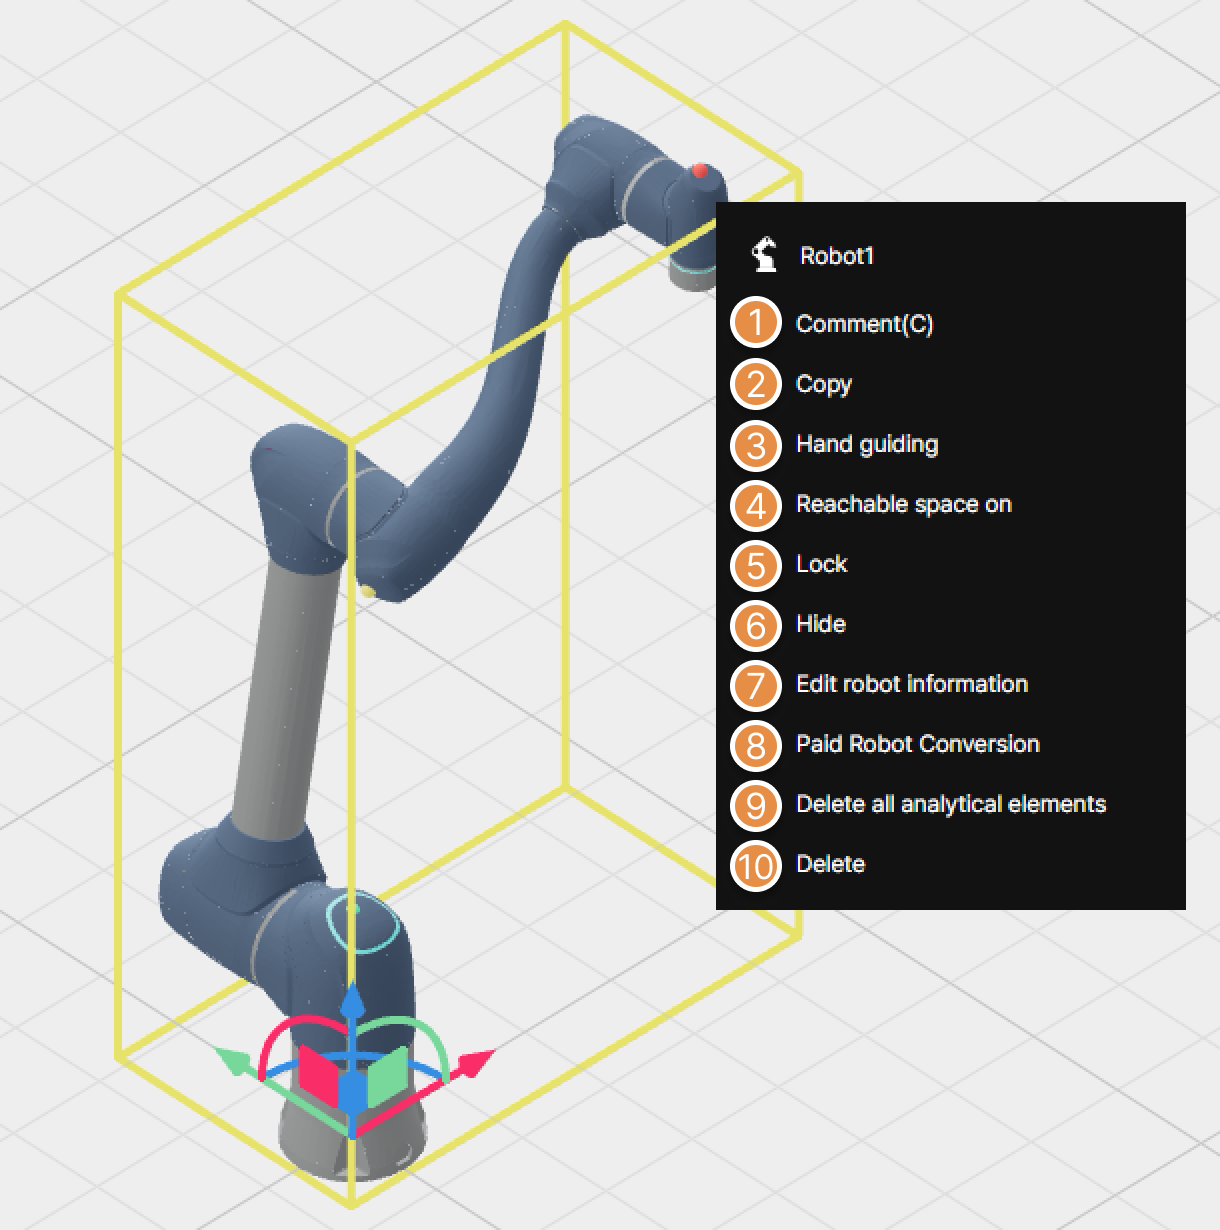
① Comment
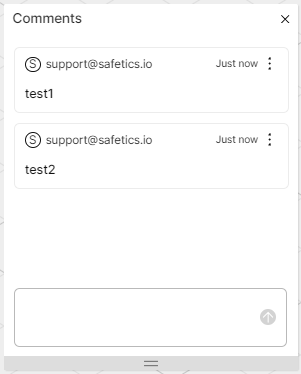
Checking the comments left on the selected robot.
② Copy
Copy the robot with the same information as the selected robot and place it on the 3D screen.
③ Hand guiding
Switch the robot to hand-guiding mode
Click and drag the pivot controller to enable real-time movement of the robot, and the specified location(waypoint) can be used for the Create motion function.
④ Reachable space
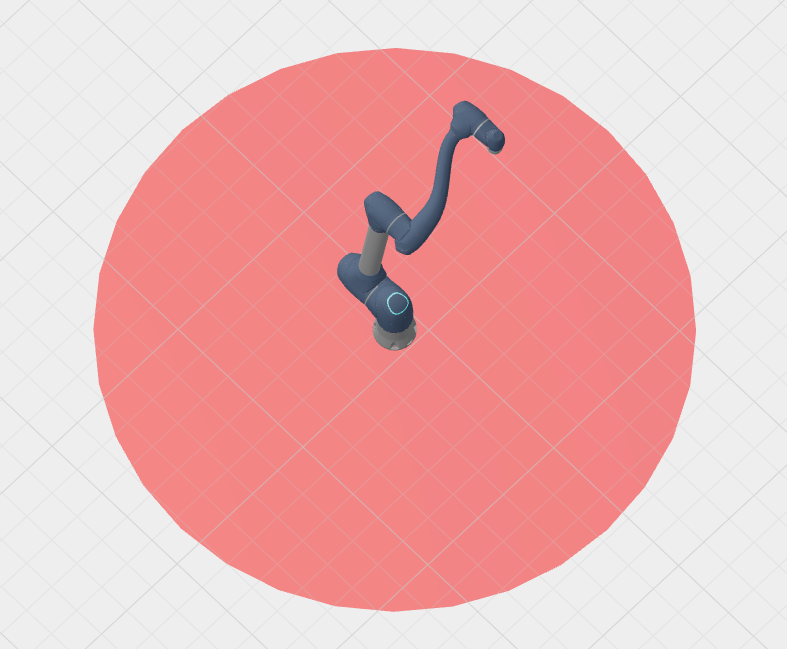
The tool center point (TCP) maximum reach area for the selected robot model is displayed.
⑤ Lock
Change the objects to a locked state to prevent interaction on the 3D screen. The locked objects can be unlocked from the layer window on the left side of the screen.
⑥ Hide
Set the robot to be invisible or visible on the 3D screen
⑦ Edit robot information
Edit the name of the selected robot or change it to a robot from a different manufacturer or a different robot model.
⑧ Delete all analytical elements
Delete all analysis information entered into the selected robot, such as gripper information, robot motion, and collision point.
⑨ Delete
Delete robot.
🚨 Robots that have a paid status and have generated a Report cannot be deleted.
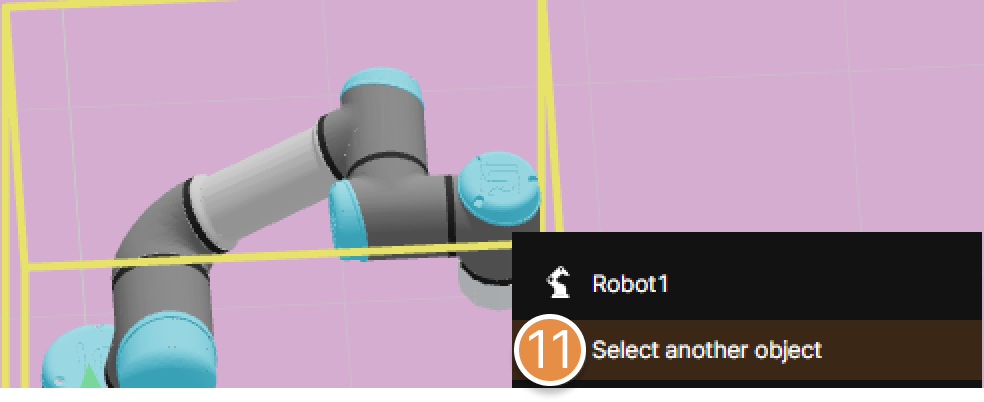
⑩ Select another object
If multiple objects, such as robots, equipment, and collaborative workspace, are on the same line on the 3D screen, right-click to see the Select another object button.
If you click the button, you can conveniently select the object you want even if it is difficult to click due to overlapping objects on the 3D screen.