
Set up a network connection based on the robot installation environment.
 Please ensure the PC’s internet connection is disconnected before proceeding with the following steps for motion extraction.
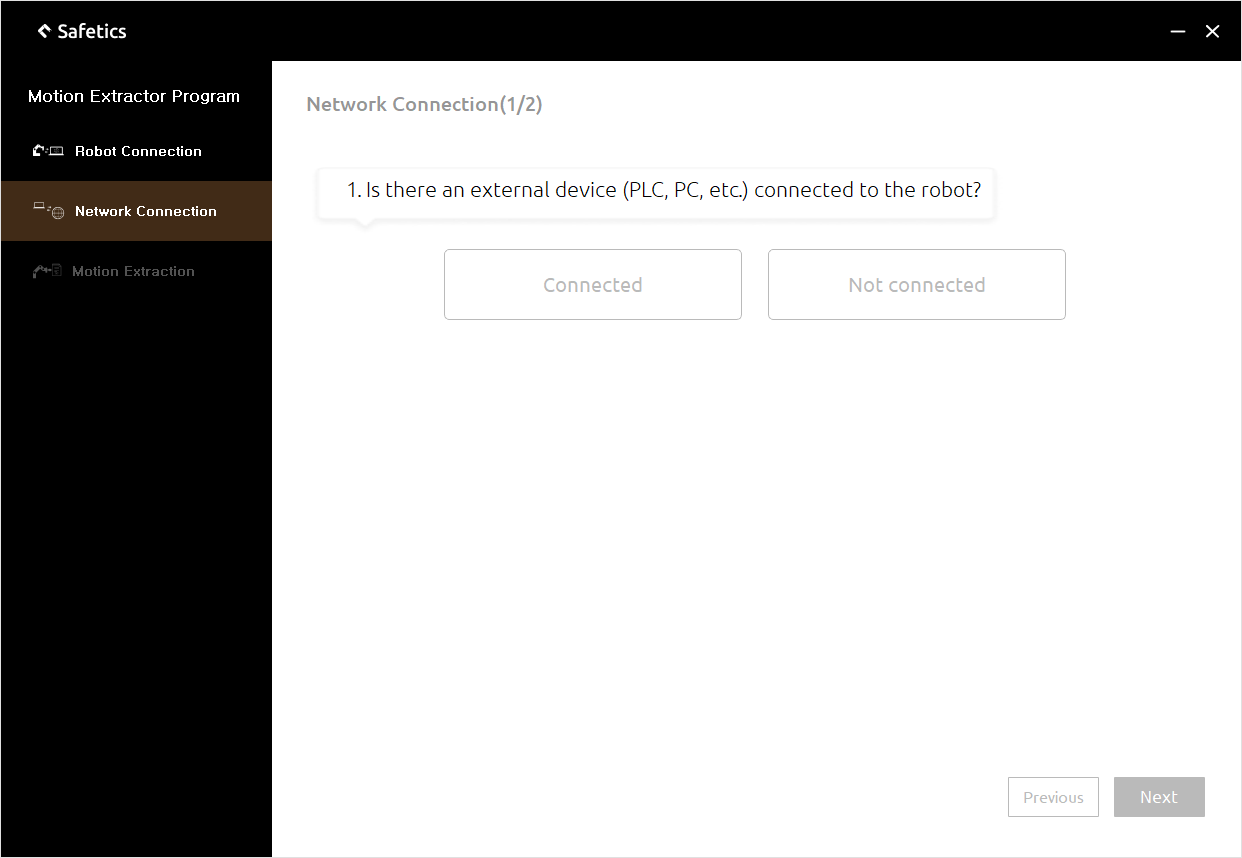
1. Connection settings 1/2
- Step 1. If the robot has an external control device such as PLC or PC connected previously, select Connected. If no device is connected, select Not connected.
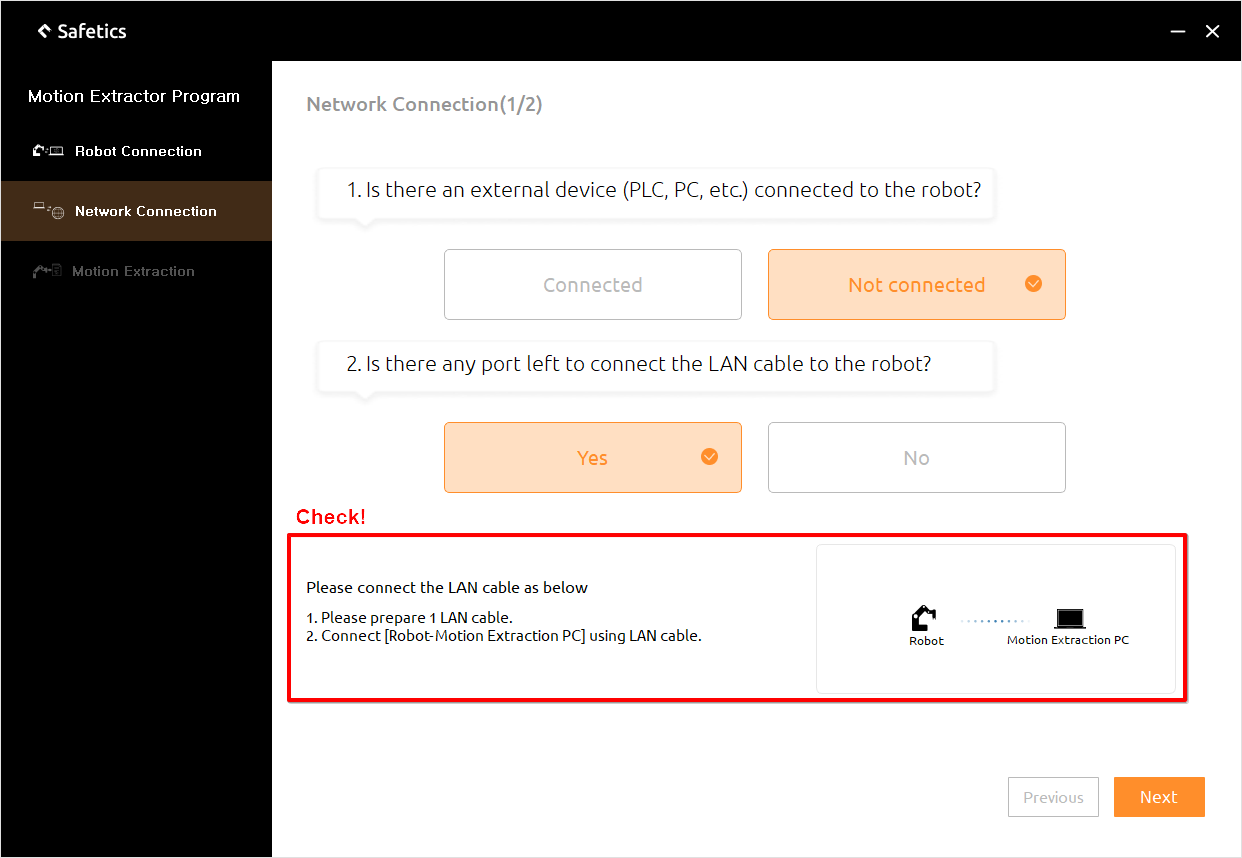
- Step 2. If the robot has a port left to connect to the LAN port, select Yes. If there is no spare port, select No.
🚨 Make sure that the robot’s port is an Ethernet port. It is impossible to communicate when connected to a port(e.g., EtherCAT) of a different standard than a PC’s port.
- Step 3. Complete the selections in Step 1 and 2 to configure the extraction environment according to the guidance that appears in the lower area of the motion extractor program.
- Step 4. Once you have finished configuration, click Next to go to the next settings screen for your network connection.
2. Connection settings 2/2
You need to proceed with the IP configuration to connect the robot and the PC.
- Step 1. Enter Control Panel > Network and Internet > Network Connection to change the PC’s network adapter settings for extraction.
- Step 2. Right-click on the Ethernet adapter that you want to connect to the robot to enter Properties
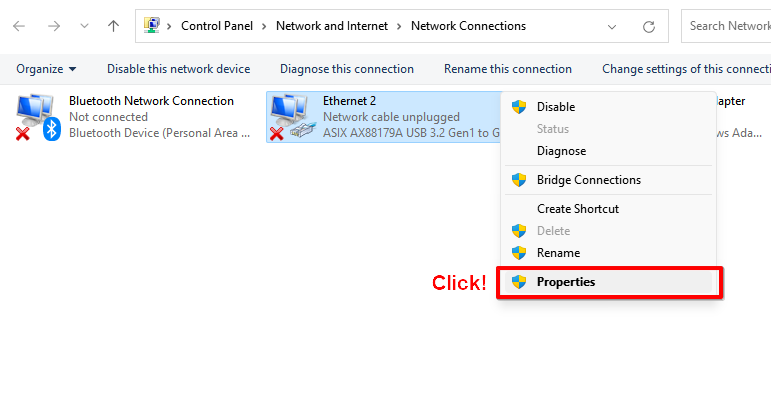
Control panel – right-click ethernet
- Step 3. On the Adapter Properties screen, select Internet Protocol Version 4(TCP/IPv4) and click Properties to open the IP Address Settings.
- Step 4. Select Use the following IP address and enter the subnet mask, default gateway, the same as the robot to extract motion.
Enter the IP address equal to the robot, but change the host number at the end of the four digits to any number less than 255.🚨 The host number for the IP address must be different from the robot and router (if the PC and robot are connected through the router).
e.g., If the robot has an IP of 192.168.10.2, a subnet mask of 255.255.255.0, and a default gateway of 192.168.10.1, type in 192.168.10.XXX, 255.255.255.0, and 192.168.10.1, respectively, on the image below. - Step 5. When the input is completed, press OK to save your settings.
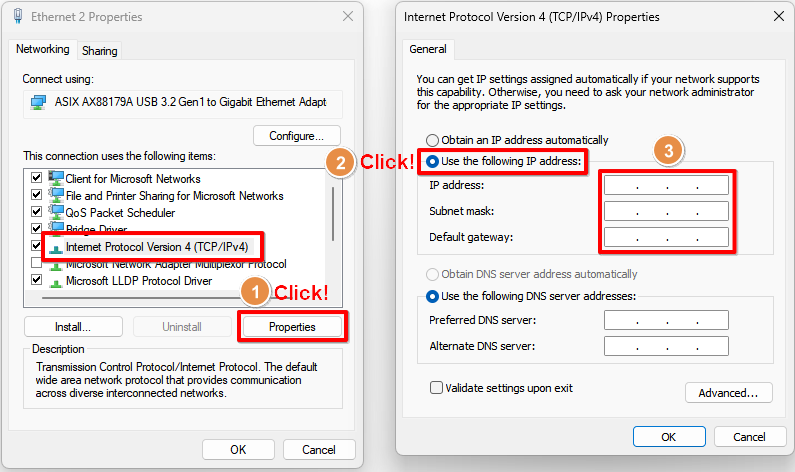
Connection settings 2/2 – ethernet and IPv4 properties
- Step 6. Enter the robot’s IP in the motion extractor program’s robot IP section, and click Check network connection to verify the robot’s connection.
If the robot is not connected as shown below, follow the action guide (How to set up a PC network) on the right side of the program to resolve the problem.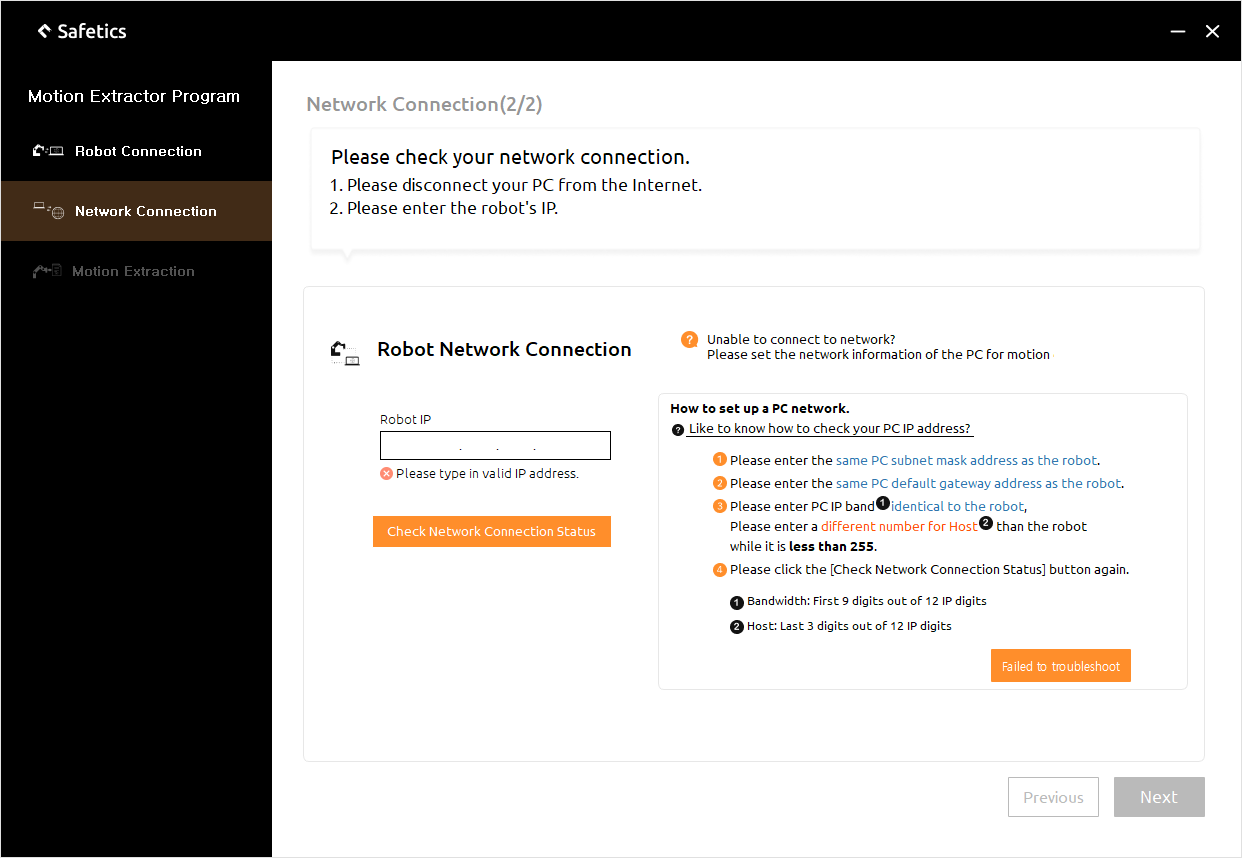
Connection settings 2/2 – connection fail
If you have followed the guide to complete the setup, but the connection does not proceed properly, reboot the PC after saving Control Panel settings in Step 5. and try connecting to the robot again.