When a robot moves, the risk of collision with a person in the collaborative workspace might not always involve all of its parts or the object it’s handling. For accurate analysis, the robot’s motion can be divided into sections (risk blocks). Within each block, different collision points and robot points can then be selected for analysis. This is known as the Motion Split function.
The example below illustrates how splitting motion blocks enables a focused collision risk analysis on the relevant parts for each stage of movement.
1. Risk Block and Risk Level Configuration
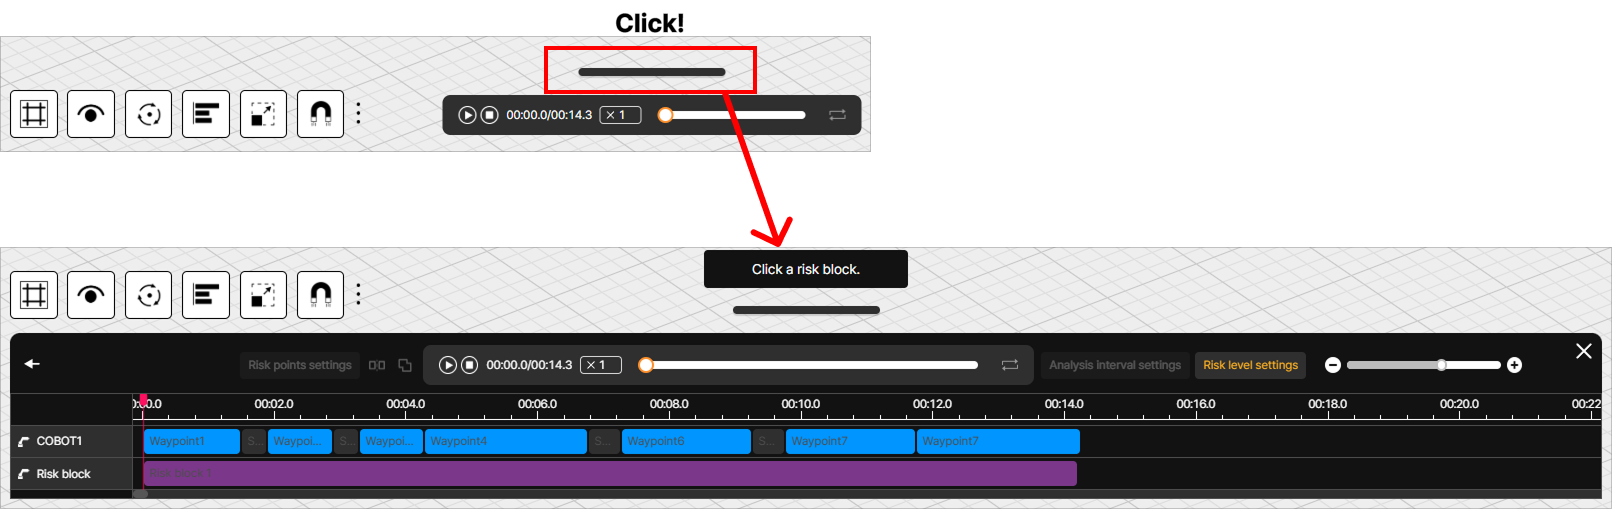
When you click the Timeline button beneath the 3D screen, a detailed menu appears at the bottom of the screen. This menu allows you to view details such as motion information within the process and playback duration.
① Risk Block Configuration
On the left side of the timeline window, you can see a list of robots and mobile platforms in the 3D screen. When you click on one of the robots from this list, the Risk Settings button will appear on the right side of the screen.
After clicking a risk block, click the Motion Split button will divide the selected risk block in half. You can adjust the size of the blocks by clicking and dragging the edge of a block with the left mouse button. If risk blocks have been split incorrectly, you can select multiple blocks while holding down the Shift key, and then click the Motion Merge button located to the right of the Motion Split button to combine them.
② Risk Level Configuration
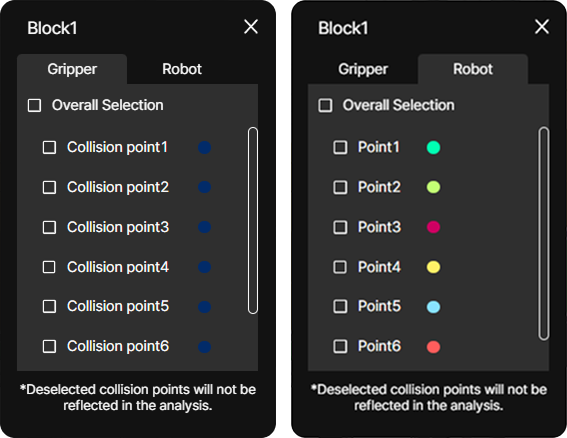
Click a split risk block, then click the Risk Points Settings button. This will display a menu where you can select whether to include each point in the analysis. Points with unchecked checkboxes are excluded from the analysis.
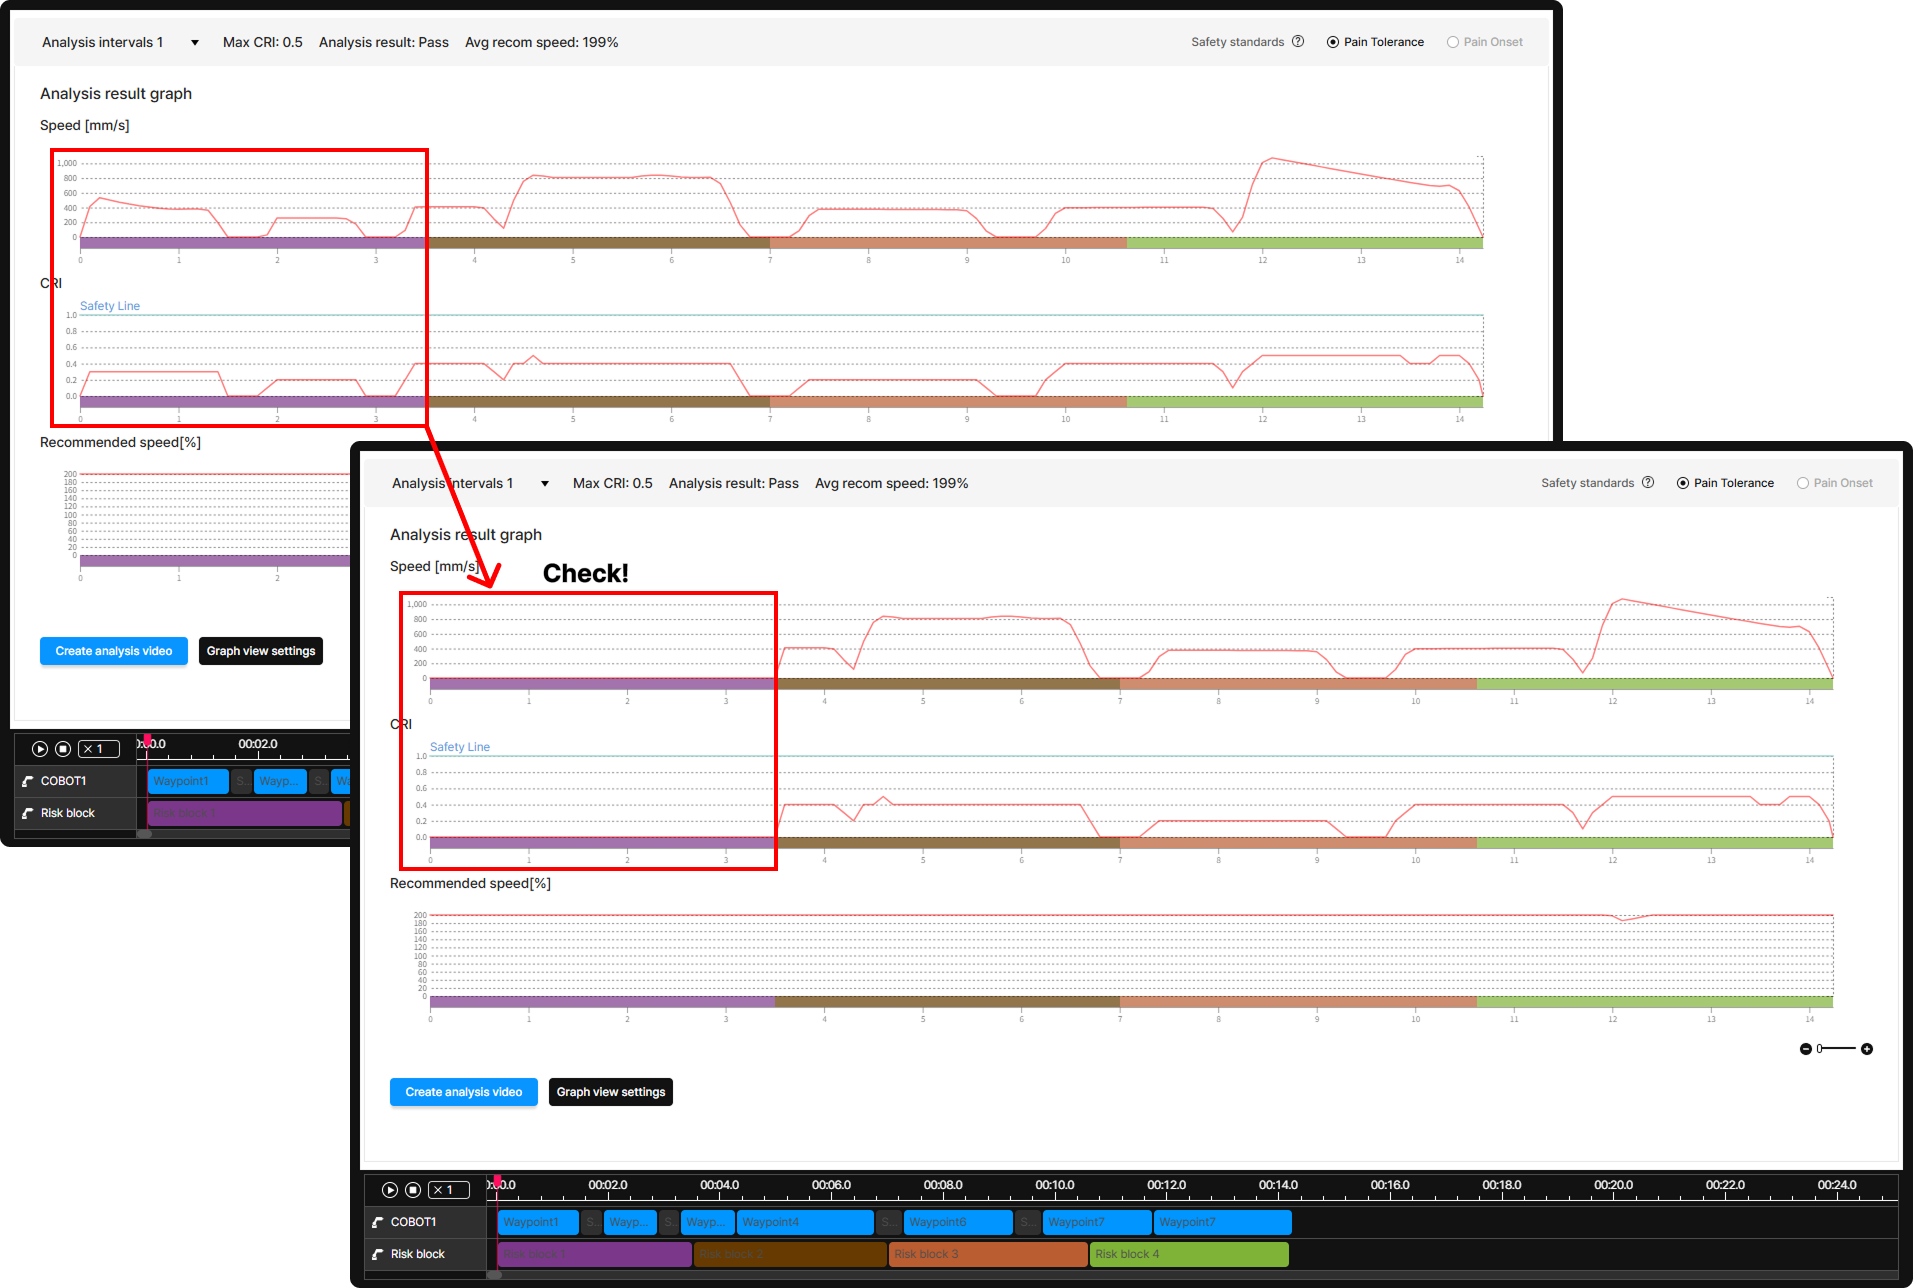
2. Check Analysis Results
The example below shows an analysis performed with all risk points for risk block 1 unchecked.
After unchecking the checkboxes, you can see that no analysis was performed on the risk Block 1 segment (00:00 ~ 00:03.7).